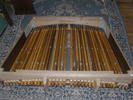
Schober Recital pedalboard

Home
Cleaning keyboards
Adding connectors
Devtronix generators
PedalboardSpecification

Introduction

Some of the suggestions on this page (such as spring adjustment) are applicable to many full-sized pedalboards, while others are very specific to the Schober Recital pedalboard.

The Schober company was justly proud of their AGO pedalboard for the Recital organ, but the pedal switch contacts are even more troublesome than those on the keyboards.  However, with some cleaning and adjustment, it's possible to get them working like new.

Slide the pedalboard out from the organ and store it in a safe place until you are ready to re-install it.

Cleaning the contacts

It is not necessary to remove the pedal switches from the console, but you will probably find it most convenient to work from the back of the console.  Make sure to have plenty of light -- I used a clamp-on utility light.

Remove as much dust as possible from the Pedal switches, being careful not to damage the gold springs.  I found a vacuum cleaner, an old toothbrush, and cotton swabs all to be useful in this.  The toothbrush or cotton swabs can be moistened with isopropyl alcohol, but be sure to use adequate ventilation.  Once the dust is mostly gone, you can clean the Pedal switches in the same way as the keyboards.  However, don't apply DeoxIT Gold until the pedalboard has been re-installed and everything is working properly, since you may need to re-clean some of the switches.

Each pedal switch has a flat copper strip to engage the end of a pedal.  Make sure the bolts that secure these strips are firmly screwed to the circuit boards.  There is also a long bolt which connects the copper strip to a plastic contact holder.  Make sure that the nut securing this bolt is tight enough so the bolt can't wobble or turn.  Fine adjustment of the copper strips comes after the pedalboard is re-installed, but if any are obviously mangled this is a good time to straighten them out. 

On early Recital organs, each of the copper strips had a felt disk stuck to the end where it contacts the bottom of a pedal.  Beginning around 1973 the felt disks were installed on the bottoms of the pedals instead.   Replace any felt that is missing or loose with similar 1/8" thick self-adhesive felt disks which are sold at hardware stores, or with thin cork disks or squares as shown in the pictures below.

If your felt disks are on the pedals (or if you decide to remove them and put them on the pedals instead), you can carefully bend the last 1/8" of each copper strip down at a 45 degree angle so it is less likely to catch on the end of a pedal as the pedalboard slides into the console.  This is entirely optional, but I've sometimes had trouble with these catching on the felt disks when the pedalboard is re-installed.

Preparing to re-install the pedalboard

pedalboard While the pedal board is out is a good time to clean it and to check for loose pedal caps. The cross-braces can temporarily be removed as shown at left for better access during cleaning and checking. I didn't find any trouble with the black plastic caps for the flats and sharps, but some of the maple caps for naturals had come loose. This can be detected by pressing the pedal partway down, then releasing it quickly; if you hear a rattle or buzz, then it's probably loose. Gently tighten the three screws on the back of any loose cap.  If any of them can't be made "finger tight" or still rattle, you may have to remove the key cap and rotate it 180 degrees, then re-install the screws.  Do this carefully to ensure that the key cap lines up with the others.  I found it helpful to stand the pedalboard on its toe end and insert some pieces of cardboard at the toe end of the key cap as a spacer to keep the cap lined up while putting in the first screw.  If you have pets or small children, never leave the pedalboard unattended while it is standing on its toe end!

felt disks on pedalboard If your pedalboard has felt disks on the bottom of the pedals where they actuate the switches, make sure that none are missing, loose, or damaged. I replaced the disks as necessary with 1/8" thick by 1/2" diameter self-sticking felt disks sold at hardware stores for use on furniture.  (The replacement disks are the darker ones in the photo at left.)  The highest and lowest pedals have little wood slat extensions; for these I used 1/8" thick by 1/2" square self-adhesive cork. The screws which hold the wood slat extensions should be tightened just enough so that a bit of pressure is needed to move the slat from side to side. This will help them hold their alignment with the switches.

When finished with cleaning and checking, replace the cross-braces if they were removed. 

I chose to replace the original metal furniture glides on the bottom of the organ and the pedal clavier with modern nylon glides.  This is optional, but it does make it easier to slide the instrument without damaging the floor.  Some of the original glides were difficult to remove.  I drilled a small shallow hole next to the old glide and then pried it out with an awl or a small screwdriver.

Re-installing the pedalboard

This was the point where I suddenly remembered why I had never installed metal glides on the front of the pedalboard.  The lower front panel of the console was cut slightly too low, and the pedalboard would not have cleared it with the glides in place.  Now that I had installed new glides, the problem was back.

checking pedalboard fit masking tape to mark the spot
I carefully removed some thickness from the front glides on the pedalboard using a file, but found that the pedalboard was still binding near the center. A light placed behind the console showed where it was binding (the places where light isn't shining through in the picture at far left), and I marked these two places with blue masking tape. Gradually I was able to remove enough wood (perhaps 1/16 inch) so the pedalboard could easily slide in. This has to be done with some care, always moving the file or 60 grit sandpaper parallel to the front of the organ so the veneer does not splinter.

Assuming the pedalboard fits, slide it in about an inch, then check from behind to make sure that the ends of the pedals won't collide with any  of the copper strips.  It helps to have two people for this part, so that one can stay behind the organ.  If any copper strip is too high, bend it down just enough to clear the end of the pedal.

Adjusting the pedal switches

Turn on one pedal stop of each pitch (16', 8', 4', and 2') then play each pedal note from behind the console by pressing down the end of the pedal by hand.  If necessary, align the copper strip and/or any wooden slat extensions by gently moving them left and right.  Make sure you can hear all four pitches when each note is played.

Ideally, each pedal switch should play when the pedal is pushed exactly halfway down.  However the first thing is to get all the switches to work.  Afterward you can adjust the playing point by bending the copper strips.

If any pitch is intermittent or missing, first check to make sure the pedal is moving the contacts far enough.  If not, check to make sure the long bolt is connected firmly to the copper strip.  If it is, you may need to bend the copper strip upwards closer to the bottom of the pedal, or to change the angle of the bolt which connects it to the key contacts.  It's actually good to have about 1/16" to 1/8" gap between the strip and the pedal (with a felt disk on one or the other side of the gap) to ensure clearance when the pedalboard is installed.  If it's much more than 1/8", bend the strip upward gently from the circuit board end.  To change the angle of the bolt, hold the far end of the copper strip against the bottom of the pedal and support the strip underneath the bolt, then carefully push the upper end of the bolt forward until the note begins to sound.  If this is done correctly, it will actually bend the copper strip in two places and the clearance to the bottom of the pedal will stay the same.

If the switch is moving properly but one or more pitches are missing, try gently pushing the switch arm (the clear plastic piece that holds the springs) from side to side.  If it intermittently makes contact, the switch probably needs more cleaning.

If all pitches except one are working, check to make sure that all the gold spring contacts are actually touching the gold bards when the pedal is depressed.  Sometimes the switch arm will warp, causing either of the inner gold spring contacts (8' or 4') to buckle slightly and not make contact. Inspect the switch arm carefully to see whether this is the problem.

There were two or three warped switch arms on my pedal switches, and I was able to solve the problem but would hesitate to recommend the method I used.

A better way to deal with a warped switch arm might be to tie or tie-wrap it carefully to a thin rod of some insulating material such as wood or plastic, perhaps a short length of 1/8" dowel rod.  I haven't tried that, but it would probably be simpler and safer than my repair.  Since the switch arms in the keyboards haven't warped, I suspect the problem is due to the way the pedal switch arms attach to the long bolt.  Shorter bolts could solve that problem, but then the spring arm would probably not move far enough to make good contact.

Once all the pedals are working, you can carefully bend the outer part of the copper strips as needed to make the pedals sound near the middle point of their travel.

Adjusting the pedalboard springs

Beneath the heel end of the pedalboard there are steel leaf springs which provide the upward force on the pedals.  If there is too little force, then just brushing against a pedal can cause it to play.  The AGO spec requires 2.5 to 3 pounds of force (about 1.2 to 1.4 kg weight) to play a note on any of the pedals.   Since the force required tends to decrease with use, it's worth checking it at least once every few years.  To adjust the leaf springs, remove the cover over the heel end of the pedalboard, apply test weights as described below, and adjust the screws which attach the springs to the pedalboard frame until each pedal sounds at the correct weight.  Usually the pressure needed to operate the pedal will initially be too light, and you will need to tighten the screw.

Schober's original suggestion to use a wine bottle as a test weight is still a good one.  I like to use two wine bottles, one filled to about 2 pounds and the other about 3 pounds.  An ordinary 750 mL (milliliter) bottle weighs almost exactly 3 pounds when full.  One which is half full will weigh about 2 pounds.  Hold the bottle vertically with the neck end down, and let the pedal support its weight.  Each pedal should not sound when the lighter bottle is applied to the pedal at a point near the player's end of the sharps, but should sound fully when the heavier one is applied.  If you re-fill bottles which are stopped with cork (or better yet, with a synthetic substitute for cork), the exposed end of the cork will help prevent slipping.

One last thing: don't ever be tempted to walk or stand on a pedalboard!  Doing so can damage the leaf springs or the block they screw into, eventually making it impossible to obtain and hold the correct adjustment.

Bibliography

Richard H. Dorf, Electronic Musical Instruments (3rd edition, Radiofile, 1968), Appendix: AGO Specifications.

Last updated September 14, 2009